


It is an important undertaking to install a new roof. This requires precision and experience. Understanding the process step-by-step can make you more confident in your project, whether you are replacing an older roof or building a brand new one. Installing a roof correctly will not only protect your home against the elements, but it will also increase its value and aesthetic appeal. This article will provide a detailed look at how to install a new roofing system.
1. Plan and Prepare for the Initial Meeting
Inspection and Assessment
First, you need to determine the current condition of your roof or the base structure for a new roof. This includes:
- Check for any damage such as cracks, leaks or rot.
- Checking structural integrity of decking and supports.
- Identification of any ventilation problems or areas susceptible to moisture accumulation.
Selecting Roofing Materials
After the roof inspection, you will need to choose the material. Popular choices include:
- Asphalt Shingles are affordable and widely used.
- Metal roofing is durable and energy-efficient.
- Clay or concrete tiles: ideal for certain architectural styles
- Wood Shingles and Shakes: Natural, aesthetically pleasing.
- Slate roofing: Premium and long-lasting.
Material has different benefits, costs, and lifespans. It’s important to pick the right one for your budget, local climate, and needs.
2. Permits, Scheduling and Obtaining them
It’s important to obtain the permits required by your local building code before you begin any work. The installation will be compliant with all safety and zoning laws.
Schedule the project after permits are obtained. The timeline can be affected by factors such as the weather and complexity of the roof.
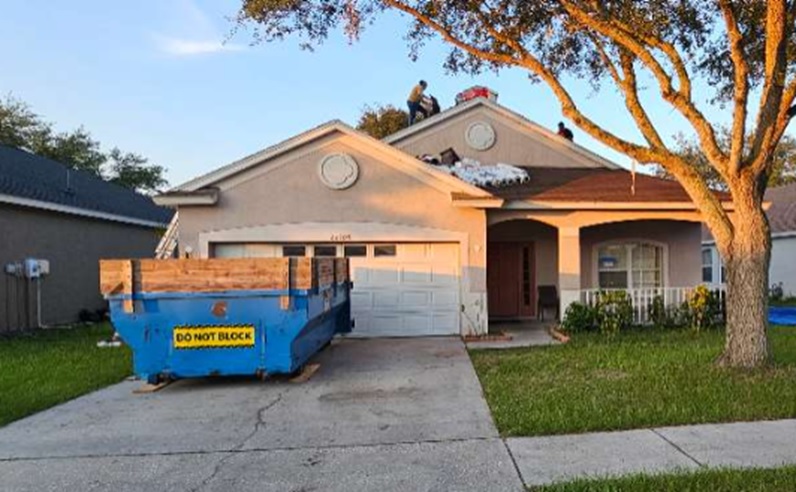
3. Prepare the job site
Protecting your property
The roofing team will do the following to protect your home:
- Spread tarps on the ground to catch any debris.
- Cover shrubs and outdoor furniture around the area of work.
- Install dumpsters or trucks to remove debris quickly and efficiently.
Remove the old roof
When replacing an old roof, all the materials must be stripped to the decking. This will reveal any issues such as damaged sheathing or rotted wood. These must be addressed before continuing.
4. The Roof Deck: Inspecting it and preparing it
The roof deck (the roof’s base) is thoroughly checked after the old roof has been removed. To ensure that the foundation of the roof is solid, any damaged or weak sections are replaced. Repairs include:
- Replace rotten or warped wood.
- Securing loose decking boards.
The deck is cleaned after repairs to provide a smooth surface that can be used for underlayment.
5. Installing Underlayment
Underlayment is an additional layer of protection that is placed directly onto the roof deck in order to create a barrier against water. This step usually involves:
- Rolling and securing underlayment.
- Ensure that the overlap is sufficient to prevent water from penetrating.
- Add ice and water barriers in areas that are vulnerable, like valleys or the eaves.
Underlayment is a crucial line of defense in the fight against moisture. It also helps to prolong the roof’s life.
6. Installing Flashing
This is a metal sheet that’s installed around the roof edge, vents and skylights in order to prevent leakage. This step involves
- Place flashing along valleys, eaves and around penetrations.
- Seal the flashing with roofing adhesive or cement.
- Ensure that all seams of the garment are water-tight.
Installing flashing correctly is crucial for keeping water from leaking into vulnerable areas of the roof and maintaining its integrity.
7. Laying the Roof Material
The roofing material can be installed after the flashing and underlayment are in place. The process depends on the material you choose:
For Asphalt Shingles:
- The roof is laid with starter shingles along the edges. This provides a strong base.
- Install shingles in rows, each row covering the previous one.
- Each shingle is secured with nails, which ensures that they are aligned correctly and are flush to the roof.
For Metal Roofing
- The panels or tiles are then cut to size, and screwed into place.
- Seams and fasteners are given special attention to ensure an airtight seal.
Tiles and Slate
- Each piece is placed individually and secured using specialized nails or clips.
- It is a laborious process that requires precision in order to achieve a uniform look.
8. Installing Ventilation Caps and Ridge Caps
For the health of both your roof and your home, it is important to maintain proper ventilation. This includes:
- Install ridge vents at the top of the roof for hot air to escape.
- Add soffit vents for better air flow from the eaves up to the ridge.
The ridge cap, which is a specially designed shingle or material, is placed over the vent to give it a finished appearance and provide additional protection.
9. Final Inspections and Cleaning
The roofing team will conduct a thorough check after the installation to make sure everything has been installed correctly. This includes:
- Check for loose nails, misaligned or other imperfections.
- Ensure that flashing and seals have a watertight seal.
After the inspection, the area of work is cleaned. Cleaning the work area involves:
- Remove all debris including nails, old roofing materials and other items.
- Clean up your driveway and yard.
10. Warranty and Maintenance Tips
A new roof is often covered by a warranty that covers materials and workmanship. Be sure to:
- Understanding the terms of warranty is important.
- To prolong the lifespan of your roof, follow recommended maintenance practices such as regular cleaning and inspections.
Installing a new roof requires a coordinated effort to ensure that your home is protected and looks good for many years. Understanding each step in the process, from preparation to material selection and final inspections, will help you make an informed decision and be confident about the quality of your roof. Installing a roof properly will not only protect your home, but it will also give you peace of mind knowing that your investment has been made to last.
This article was written by a professional from Baypoint Roofing. Baypoint Roofing, a State certified, insured, bonded and licensed roofing contractor, specializes in insurance restorations, storm damage Roof Repair Land o Lakes FL and expert roof installations and inspections. We proudly serve Florida with over 25 years experience. Our team of skilled professionals will provide you with unmatched service and quality, whether you require a roof replacement or repairs. Baypoint Roofing will protect your home and business with solutions designed to withstand Florida’s elements. We strive to exceed expectations. We are committed to your satisfaction.
How to get your pool certified in Australia: a step-by-step guide
Owning a pool in Australia comes with legal responsibilities. Every state and territory requires pools and spas to meet strict...

Viewing A Villa As A Long-Term Lifestyle Decision
Buying a villa should be judged as a lifestyle decision as much as a property purchase. The right setting needs...

Essential Electrical Design for Modern Properties
Thailand boasts a rapidly expanding property market. From sleek villas in Phuket to modern high-rise apartments in Bangkok, contemporary homes...

Top Tips for Maintaining Your Shade Sails Year-Round
Installing a shade structure is an investment in your property and lifestyle. It transforms outdoor areas into usable spaces, shielding...